What Are the Top Types of Exhibition Standard Stands?
Choosing the right Exhibition Standard Stand is more than a styling decision. It affects how visitors find your brand, handle product samples, and speak with your team. UFI’s Global Economic Impact of Exhibitions report, prepared with Oxford Economics, estimated that exhibitions worldwide attracted 303 million visitors and 4.5 million exhibiting companies in 2019. The report also estimated $325 billion in business sales connected to exhibitions. These figures show the scale of the channel, though they do not guarantee results for any individual exhibitor. A stand still needs to fit its audience, budget, and practical goals.
Common options include shell-scheme stands, modular systems, custom-built displays, and portable pop-up stands. Each suits a different setting. Shell schemes provide a straightforward structure, while modular designs can be rearranged for different floor plans. Custom builds offer more control over layout and finishes, but often demand greater planning. Portable displays are easier to transport, though they may provide less room for demonstrations or storage. Small details matter. A clear aisle-facing message, reachable samples, and tidy cable placement can shape the visitor experience. A polished render can still conceal awkward storage or poor sightlines. This guide compares the main stand types, their strengths, and their trade-offs, so exhibitors can make a more informed choice. There is no perfect format for every event; the right fit depends on what visitors need to see and do.
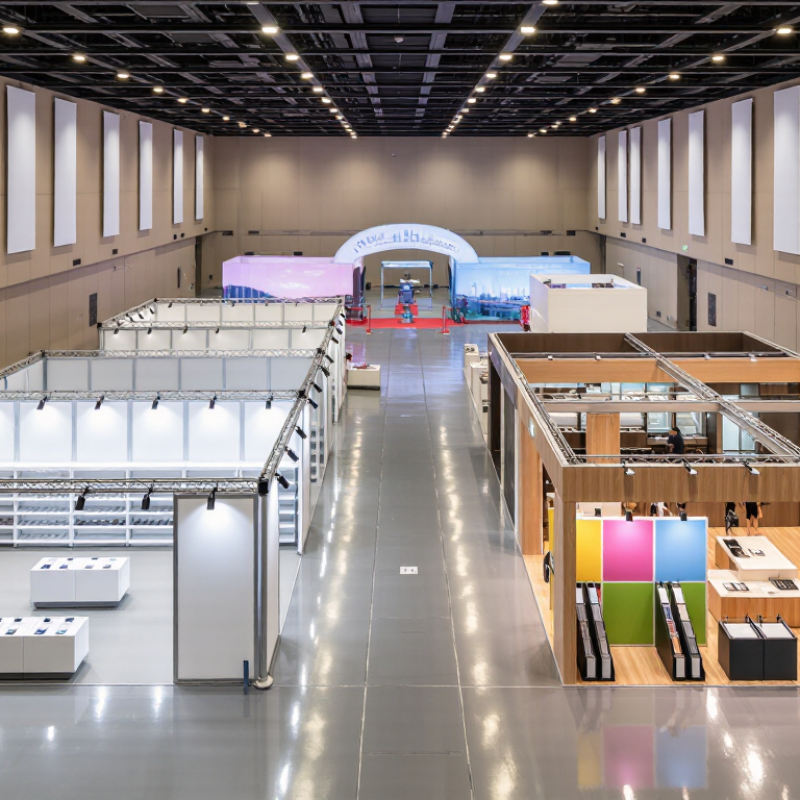
Defining Exhibition Standard Stands by Layout, Construction, and Reuse
Exhibition standard stands are best understood through three practical features: layout, construction, and reuse. An inline stand usually has one open side and sits between neighboring exhibitors. Corner layouts open onto two aisles, while peninsula and island layouts offer access from more directions. That changes how visitors approach a display. A counter near the entrance can welcome people, but it may also block the flow if the aisle is narrow.
Construction shapes what each layout can support. Many standard stands use modular frames, wall panels, shelves, and a reception counter. Their parts can be assembled in different configurations, though not every system allows every design. Check the specified load capacity before placing heavy equipment on a shelf. Also consider where lighting cables, storage, and graphics will sit. Small details matter.
Reuse is another useful way to classify a stand. Reusable frames and panels can serve at several events, while replaceable graphics refresh the look. This can reduce repeated material purchases, but only if components are stored carefully and fit future booth sizes. Scratched panels and missing connectors are common annoyances. Not always. A highly customized layout may look distinctive, yet be harder to adapt later; exhibitors should weigh visual impact against transport, storage, and setup time.
Shell-Scheme Stands: The Common 3 × 3 m (9 m²) Exhibition Footprint
A 3 × 3 m shell-scheme stand gives exhibitors a familiar 9 m² footprint. It is a common choice at trade shows, especially for smaller teams or focused product displays. The organizer typically supplies partition walls and a fascia, while furniture, lighting, and power may vary by package. Check the exhibitor manual before planning.
Nine square metres sounds generous on paper. In practice, a counter, two chairs, and a display can quickly narrow the visitor area. Keep the entrance open and place tall graphics against the rear wall, where they are easier to see from the aisle. A small lockable cabinet helps store bags and spare materials.
Not much room.
Measure larger items before shipping them. Shell walls and support positions can affect where panels, shelves, or screens fit, and usable space may feel smaller than the stated footprint. Leave clear access to any electrical points, and confirm their location with the organizer. A simple floor plan helps, though it may need revising once the stand is built. That happens. A restrained layout often works better than filling every corner, but the right balance depends on what visitors need to see and do.
Modular Stands: Reconfigurable Builds Using OCTANORM’s 40 mm Profile System
A 40 mm modular profile system can shift from a compact booth to a larger island layout. The same uprights, beams, and connectors can support shelving, counters, or a lit product wall. That flexibility helps teams adapt to different floor plans without rebuilding every structure. It still takes careful planning. Measure booth boundaries, ceiling height, and access routes before choosing components.
Aluminum profiles are durable, but their value depends on repeated use and sensible storage. The Aluminum Association reports that recycling aluminum uses about 95% less energy than producing primary aluminum. That figure concerns recycling, not modular reuse; keeping sound parts in service may avoid replacement fabrication, but transport and storage matter too. A practical checklist should track each part’s dimensions, condition, and connection points. One weak spot is often overlooked: a missing clamp can delay an otherwise simple build.
Tips: Label beams by length, photograph each packed section, and test the layout before shipment. Leave room for cables and lighting. Don’t assume every configuration will work. Keep a spare connector kit on hand.
Portable Pop-Up Stands: Comparing Common 2.25 m and 3 m Display Widths
Portable pop-up stands commonly use 2.25 m or 3 m display widths. The smaller option suits compact floor spaces and is easier to move through crowded halls. A 3 m display adds 0.75 m of frontage, about one-third more room for graphics, product shelves, or a meeting point. That extra space helps, but only when the stand’s allocated floor area can accommodate it.
CEIR’s 2023 Index reported that exhibition industry performance reached 96.3% of its 2019 level, showing continued recovery in face-to-face events. This is useful context, not proof that larger stands perform better.
Measure the booked space, nearby aisles, and access to power before choosing a frame. Check the packed frame length, too; a display that fits the booth may still be awkward to transport.
Worth checking twice.
I would avoid treating either width as a universal standard. Venue layouts and graphic-panel sizes vary, and a wider display can feel cluttered if the design has too many messages. A simple mock-up with tape on the floor can reveal that problem before the event.
Island Stands: Four-Sided Access and Its Impact on Visitor Flow
What Are the Top Types of Exhibition Standard Stands?
Island Stands: Four-Sided Access and Its Impact on Visitor Flow
An island stand is open on all four sides, giving visitors several ways to approach and leave. This can reduce bottlenecks around a single entrance and make demonstrations visible from different aisles. It also asks more of the layout: without clear zones, people may cut through the stand or miss key displays. CEIR attendee-profile figures report that 81% of trade show attendees have buying authority, making easy access valuable for exhibitors seeking meaningful conversations. That figure does not prove island stands generate more leads; layout and staff engagement still matter.
Think in paths, not just square metres. Place a hands-on demo where it can attract attention without blocking circulation. Keep a visible route to the information counter, and avoid placing tall structures on every edge. A small open corner can invite visitors in; a crowded centre can make them hesitate. Four-sided access is an advantage, not a guarantee of even traffic. Watch how visitors move during the event, then adjust staff positions and displays where possible.
Tips: Mark the main visitor route before designing the stand. Leave clear space around demos, and give staff positions that do not obstruct entry. Check the flow during busy periods; your original plan may need revision.

 Contact Us