Inquiry
Form loading...

How to Choose the Right Exhibition Booths for Your Business

Choosing the right Exhibition Booths is not a matter of picking the largest space or the brightest screen. It is a business decision: your booth should help the right visitors understand what you offer, remember your brand, and take a useful next step. UFI’s 2024 Global Exhibition Barometer reported that exhibition-industry revenue rose by 20% in 2023 compared with 2022. The report also recorded expectations for further growth in 2024. That recovery makes careful planning more valuable, not less.

As Kai Hattendorf, former UFI CEO, has said, “There is no substitute for face-to-face.” A booth gives that encounter a physical setting: a clear entrance, a product visitors can examine, and a quiet place for a conversation. The details matter. If visitors cannot spot your main message from the aisle, an expensive display may still miss its purpose. A beautiful booth can feel oddly empty, too.

The right choice begins with practical questions. Who needs to stop? What should they understand in ten seconds? Will the layout support demonstrations, private discussions, or lead capture? Match the footprint, materials, lighting, and staff capacity to those goals. Freeman’s 2024 Trends Report also highlights the value attendees place on in-person experiences, reinforcing the role of thoughtful exhibit design. Yet reports cannot choose your booth for you. Your audience, budget, venue, and team are different. Use the figures as context, then test your assumptions against real visitor behavior. A modest, well-planned space can outperform a larger one. That is worth remembering.
How to Choose the Right Exhibition Booths for Your Business

Set Booth Goals with CEIR’s 81% Buyer-Authority Benchmark

CEIR’s widely cited attendee benchmark reports that 81% of trade show attendees have buying authority. That is a strong reason to plan for qualified conversations, not just foot traffic. Still, authority is not the same as budget approval or purchase timing. Numbers need context. Set one primary booth goal: book decision-maker meetings, qualify active projects, or demonstrate a product in use. Give that goal a countable measure, such as meetings held per day or follow-up requests captured. Track the results consistently.

Use those targets to choose your booth’s footprint and layout. A compact space can work for scheduled conversations; equipment demonstrations need clear viewing space and room for staff to move. Place the demo where aisle visitors can see it, but keep the entrance open. Put a small meeting table beyond the main traffic line, with lead-capture tools within reach. Test it in person. A floor plan can hide awkward bottlenecks. After the show, compare qualified leads and meetings against your targets. I would revise the layout if staff report crowded demos or visitors leave before speaking. It is easy to overestimate floor space.

Compare Inline, Corner, Peninsula, and Island Booth Formats

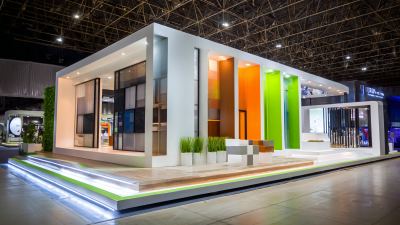
An inline booth sits in a row, usually with one open side. It can suit a focused product display or a first-time exhibitor working with limited floor space. A back wall carries graphics, while a counter and two shelves keep samples within reach. The format is efficient, but neighboring booths may compete for attention. Keep the main message readable from the aisle.

A corner booth opens onto two aisles, offering more entry points and better sightlines. Place a demo table near the corner, not across the entrance, so visitors can step in easily. Small change. A peninsula booth has three open sides and shares a rear wall with another booth. It offers room for a larger demonstration, though staff need to watch several approach angles. A tall display can block views, even when it looks impressive on a floor plan.

An island booth is open on all four sides and can support distinct zones for meetings, product trials, and storage. It also demands careful planning: visitors may enter from any direction, and a cluttered center quickly feels awkward. Walk the proposed layout at eye level before approving it. Mark counters, screens, and queues with tape if possible. The best format depends on your goals, staffing, budget, and the actual aisle traffic; a spacious layout is not automatically a useful one.

Use the Standard 10×10-Foot Module to Plan Booth Space

How to Choose the Right Exhibition Booths for Your Business

Use the Standard 10×10-Foot Module to Plan Booth Space

A standard 10×10-foot booth gives you 100 square feet to work with. Picture a floor grid before choosing displays: each square foot affects visitor movement. A narrow counter can quickly block an entrance. Measure large items, including cases and screens, before deciding where they belong. Check the event’s exhibitor guidelines, too, since height limits and included furnishings can vary.

Plan for people, not just products. Leave a clear route from the aisle to your main display, and make room for visitors to pause without crowding your staff. A small table, two stools, and one focused product demonstration may work better than several competing displays. Storage matters as well. Even a modest supply box can take up valuable floor space. I’d still sketch more than one layout; the first draft is often too optimistic.

Match Booth Materials and Layout to Staffing and Product Demos

Choose booth materials around the work your team must do. A fabric backdrop is light and quick to install, but it will not support heavy shelves. For product demonstrations, use stable counters, concealed cable routes, and surfaces that resist fingerprints. Glass can make a compact booth feel open; it also creates glare under bright hall lighting. Test samples under similar lights before ordering. I have seen layouts look spacious on paper and feel cramped once two staff members start talking.

Match the floor plan to staffing. CEIR reports that 81% of trade show attendees have buying authority, so a booth should make qualified conversations easy to start and continue. Leave a clear approach, then position a demo counter where one employee can present while another greets visitors. Event Marketing Institute’s 2016 EventTrack report found that 74% of consumers were more likely to buy after engaging with a branded event experience. That supports hands-on demos, but not a crowded queue. A practical test: rehearse the demonstration with your actual team and equipment. Time it. If visitors block the aisle or staff cannot answer questions, reduce the demo footprint or add coverage. A small planning miss can undo an expensive finish.

Check Venue Rules, Accessibility, Utilities, and Fire-Safety Limits

Before choosing an exhibition booth, read the venue’s current exhibitor manual. It may set limits for booth height, hanging signs, floor loading, and aisle clearance. Ask the venue team to confirm any unclear dimensions in writing. A sketch that looks compliant on a screen can still exceed a ceiling or obstruct a neighboring booth.

Accessibility needs room in the layout, not just a clear entrance. Keep pathways wide enough for visitors using mobility aids, and avoid placing cables across walking routes. Check where power outlets, internet connections, and water points are located before finalizing the design. Long cable runs can create trip risks and add installation costs. Measure twice.

Fire-safety requirements vary by venue and local authority, so confirm approved materials, sprinkler clearance, and rules for lights or enclosed structures. Do not assume a fabric or display panel is acceptable because it was used at another event. Keep exits and fire equipment visible and accessible. I once underestimated how much storage a compact booth needed; the spare boxes ended up crowding the back wall. That was a useful, slightly embarrassing reminder to plan for real setup conditions, not only the polished floor plan.

How to Choose the Right Exhibition Booths for Your Business - Check Venue Rules, Accessibility, Utilities, and Fire-Safety Limits
Planning dimension Useful planning data What to confirm before choosing
Booth footprint Common planning examples include 10 × 10 ft (100 sq ft), 10 × 20 ft (200 sq ft), and 20 × 20 ft (400 sq ft). Availability and layouts vary by event. Compare the assigned floor area with the dimensions of your display, counters, storage, and visitor space. Confirm whether the organizer measures the space in feet or meters and whether the listed dimensions are clear usable dimensions.
Venue rules and height Exhibitor manuals may set limits for booth height, back-wall height, hanging signs, lighting, and visibility near neighboring booths. There is no single height limit that applies to every exhibition. Check the event’s current exhibitor manual and approval deadlines. Ask the organizer to approve custom structures, suspended elements, or designs that extend above the standard booth height before fabrication.
Accessible route Where the U.S. ADA applies, an accessible route is generally at least 36 in (915 mm) wide, subject to specific exceptions and requirements. A 60 in (1525 mm) turning space is a useful layout reference. Keep the route through the booth clear of furniture, cables, merchandise, and display bases. Confirm the applicable accessibility standard with the venue; requirements differ by jurisdiction and event layout.
Aisles and visitor flow Aisle widths and clearances are established by the venue and event plan; they are not universal booth-design dimensions. Do not place signs, demonstrations, queues, or equipment in shared aisles. Review the floor plan and ask the organizer how crowd queues and accessible circulation must be managed.
Electrical utilities Estimate electrical demand from each device’s rated watts or amps. For a single-phase load, watts ÷ volts gives an approximate current in amps; actual service requirements depend on the equipment and venue supply. Prepare an equipment and power-load list, then confirm voltage, outlet type, circuit capacity, connection location, labor charges, and order deadlines with the venue’s electrical provider. Keep cables out of walking routes or protect them as approved.
Water, drainage, and data Water, drains, wired internet, and other connections may be available only in designated floor locations and may require advance ordering. Confirm service availability, connection points, pressure or bandwidth needs, fees, and installation rules. Do not route hoses or cables where they create an unprotected trip hazard.
Fire safety and materials Fire codes and venue rules can require flame-resistant materials or documentation for curtains, banners, floor coverings, and decorative elements. Specific test standards and certificates vary by location. Ask the organizer or fire authority which materials and certificates are accepted. Keep required exits, fire equipment, and access routes unobstructed; do not assume a material is approved based only on a supplier’s description.
Overall booth fit A booth must accommodate its structure, equipment, staff, accessible circulation, and any required clearances within the approved footprint. Create a scaled floor plan showing dimensions, doors or openings, furniture, equipment, cable routes, and visitor movement. Obtain written venue approval for any feature that affects height, utilities, access, or fire safety.
Planning note: The measurements above are general planning references, not a substitute for the event’s exhibitor manual, applicable building and fire codes, or accessibility requirements in the event’s jurisdiction.